
Getting Started with Database Audit
Database audit is deployed in bypass pattern. It records user access to the database in real time, generates fine-grained audit reports, sends real-time alarms for risky operations and attack behaviors. In addition, database audit generates compliance reports that meet data security standards (such as Sarbanes-Oxley) to locate internal violations and improper operations, thus ensuring data asset security.
You can audit Relational Database Service (RDS) databases, and any databases you built on HUAWEI CLOUD Elastic Cloud Servers (ECSs) and Bare Metal Servers (BMSs). The audit will not affect your services.
This guide takes a self-built ECS database (running Linux OS) as an example to describe how to audit a database.
Step 1: Purchase Database Audit
1. Log in to the HUAWEI CLOUD management console.
2. Go to the Buy Database Audit page.
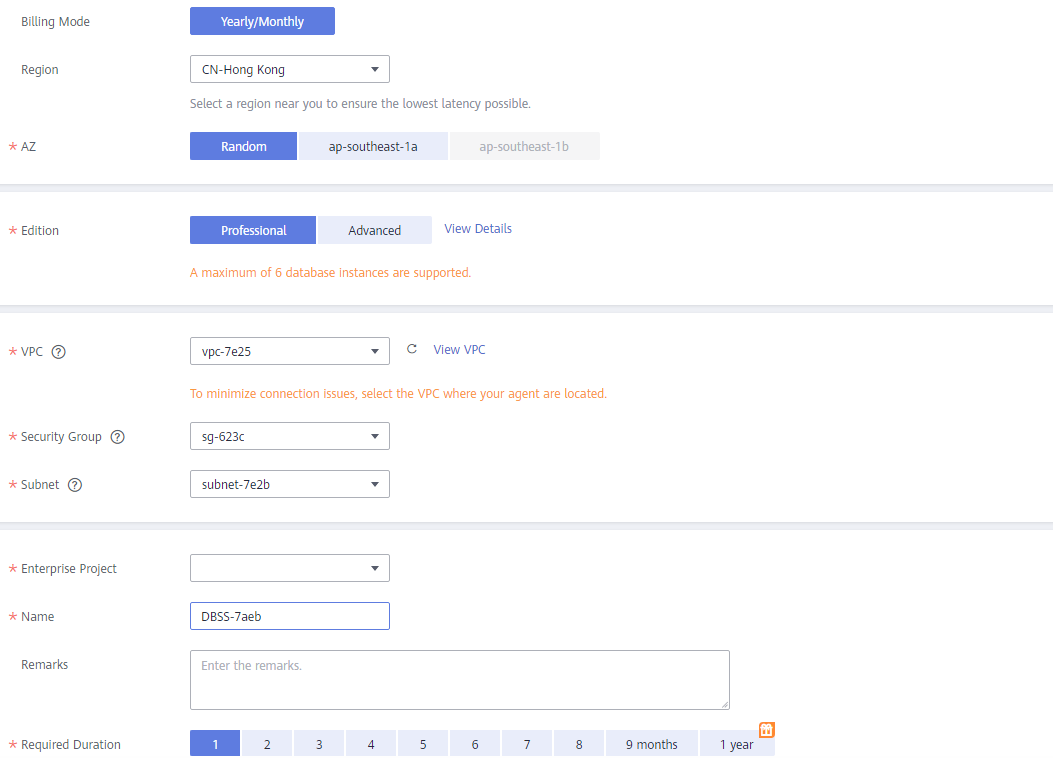
3. Configure the parameters of the database audit instance and purchase the instance.
1
Configuring database audit instance parameters

View Image
Step 2: Add a Database and Enable Audit
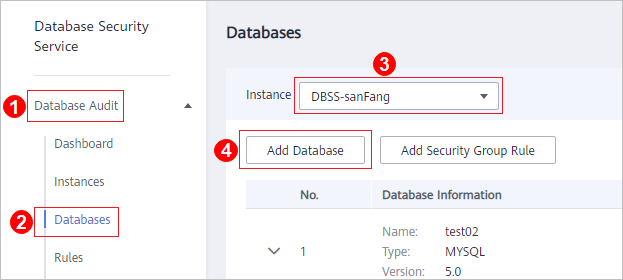
1. In the navigation tree on the left, choose Database Audit > Databases. Click Add Database.
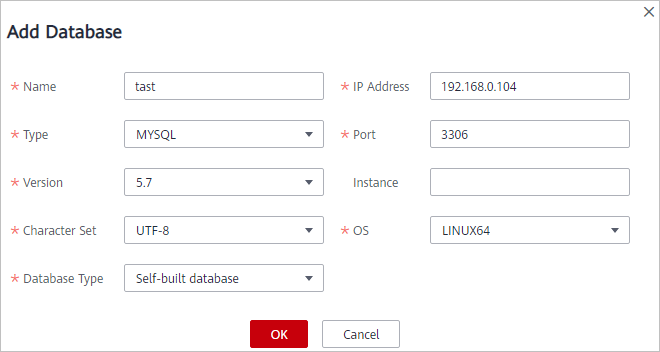
2. Configure database parameters.
3. After the agent is installed, click Enable in the Operation column of a database.

Note
The initial Audit Status of an added database is Disabled.
1
Adding a database
2
Configuring database parameters
2
Enabling Database Security Audit

View Image
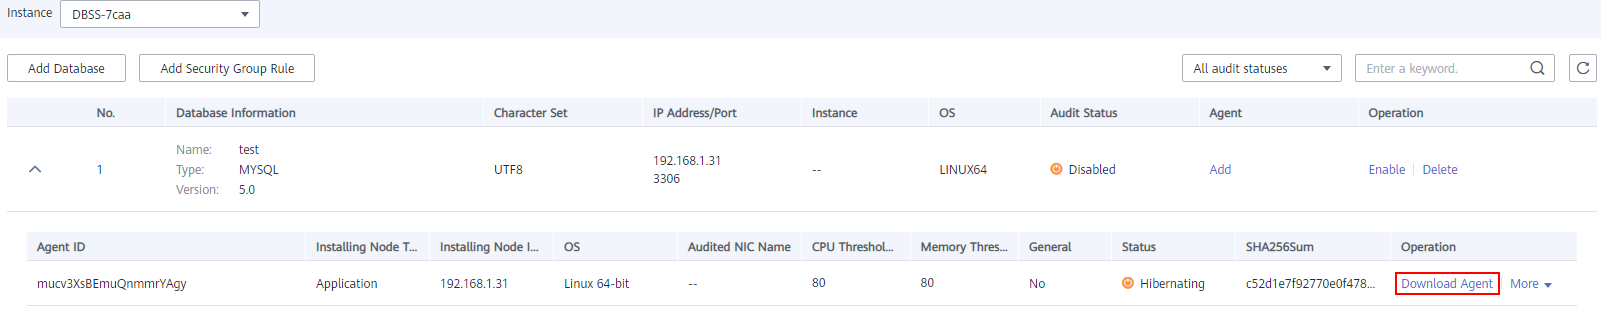
Step 3: Add and Install an Agent
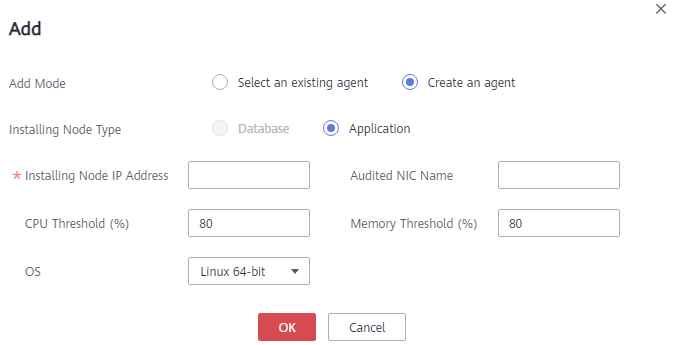
1. In the Agent column of the database, click Add.
2.Download the agent installation package.
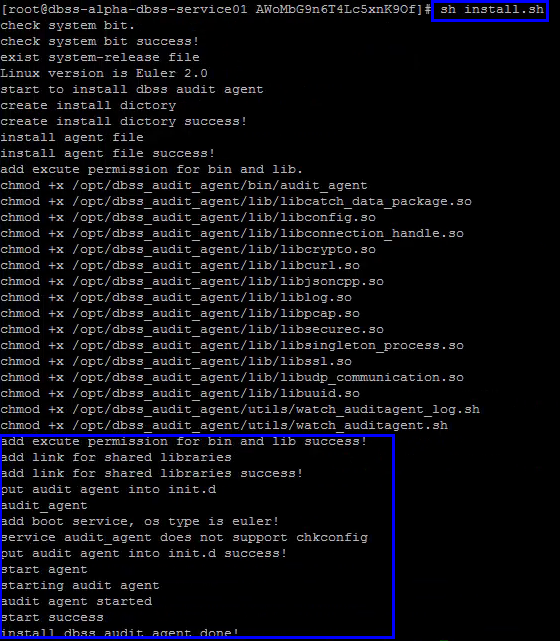
3. Log in to the self-built database on the ECS and install the agent.
Note
- The Installing Node Type of a self-built database on ECS or BMS can be Database or Application.
The full audit rule takes effect by default. All databases connected to the database audit instance are audited. You can check the audit results of the database after the agent is installed.
1
Adding an agent
2
Downloading the agent installation package
3
Installing an agent
View Image
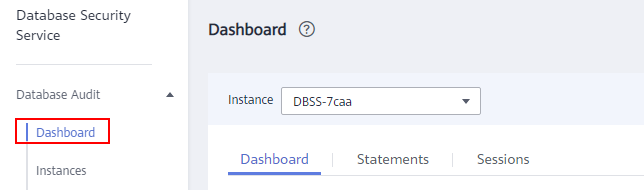
Step 4: Check Audit Results
1. In the navigation pane, choose Database Audit > Dashboard.
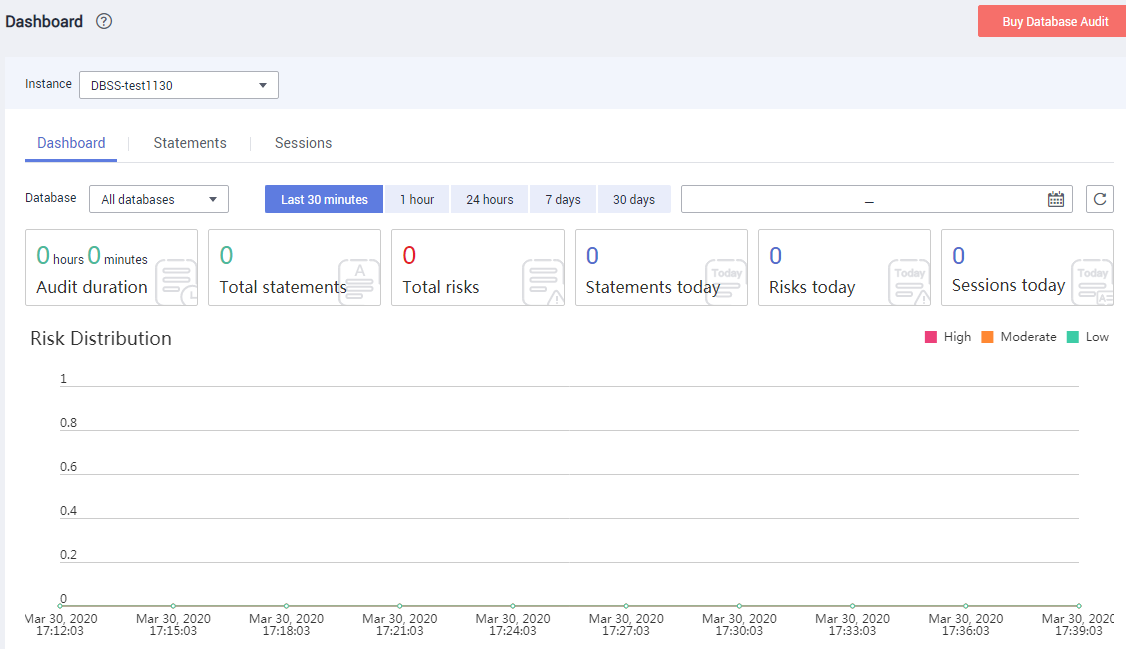
2. On the Dashboard page, check the overall database audit status.
Note
You can view database audit reports in Google Chrome or Mozilla FireFox.
1
Going to the Dashboard page
2
Checking audit results
View Image
Feedback
Was this page helpful?
Provide feedbackThank you very much for your feedback. We will continue working to improve the documentation.See the reply and handling status in My Cloud VOC.
For any further questions, feel free to contact us through the chatbot.
Chatbot


